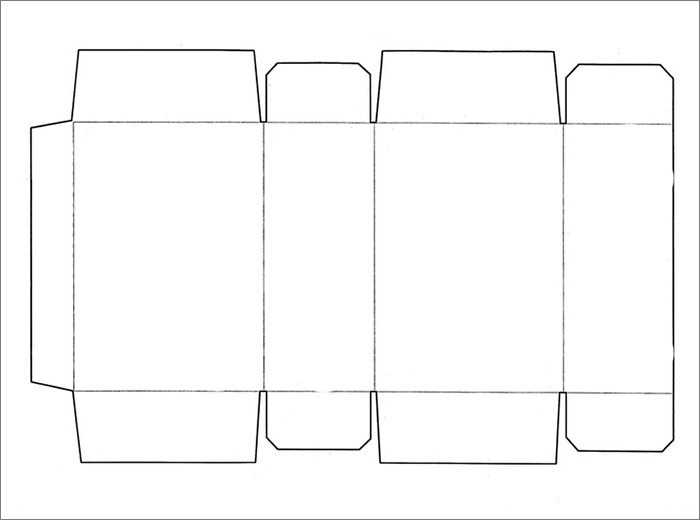
Download a ready-made dieline in PDF format and verify that the page scale is set to 100 percent before sending it to your printer. Use 200–250 gsm cardstock for small gift packaging and 250–300 gsm stock for heavier items such as candles or jars to prevent bending at the edges.
Check that the layout includes clearly marked fold lines and separate glue flaps at least 10–15 mm wide to provide stable adhesion. Score along dashed lines with a blunt knife or scoring tool before folding to achieve sharp edges and reduce surface cracking.
Measure the object you plan to pack and add 5–10 mm clearance on each side when selecting dimensions. For example, an item measuring 8×8×4 cm requires an inner capacity of at least 9×9×5 cm to allow easy insertion and lid closure without strain.
Printable Paper Box Template with Fold Lines and Glue Tabs
Select a flat packaging layout that includes solid cut lines, dashed fold indicators, and clearly marked adhesive flaps at least 12 mm wide. Narrow tabs often detach under weight, especially when using cardstock below 200 gsm.
Verify internal dimensions before printing. Add 5–10 mm clearance to the measured length, width, and height of the item to prevent tight fitting. For example, a product sized 6×6×3 cm should be placed inside a structure with an inner space of at least 7×7×4 cm.
Use scoring tools along dashed guides prior to folding to achieve straight edges and prevent surface cracking. Apply even pressure with a bone folder or blunt knife; avoid sharp blades that may tear fibers and weaken corners.
Choose material weight based on load. Lightweight packaging for candies or small accessories works with 180–220 gsm sheets. Heavier contents such as cosmetics or glass jars require 250–300 gsm stock and reinforced bottom panels with double-layer construction.
Apply adhesive in a thin, continuous strip along each glue flap rather than placing dots. Liquid craft glue requires 20–40 seconds of pressure; double-sided tape offers cleaner assembly and shorter drying time.
Test one assembled unit before mass production. Check lid alignment, corner symmetry, and base stability on a flat surface. Minor adjustments to flap width or fold accuracy improve structural strength and final presentation.
How to Scale a Paper Box Template to Fit Specific Item Dimensions
Measure the item’s length, width, and height with a ruler accurate to 1 mm, then add 5–10 mm clearance to each dimension before resizing the packaging layout. This allowance prevents tight edges and supports smooth insertion and removal.
Calculate the scaling percentage using a simple ratio. Divide the required internal width by the current internal width shown on the dieline. Multiply the result by 100 to get the new print scale. For example, if the original design fits 5 cm and you need 8 cm, use 160 percent scaling.
Adjust size uniformly to maintain proportions. Activate lock aspect ratio in your PDF editor or printer settings so height, width, and depth expand at the same rate. Manual stretching in one direction distorts panels and misaligns glue flaps.
Recheck fold placement after resizing. Ensure that adhesive tabs remain at least 10–12 mm wide and that bottom panels still overlap correctly. Overscaling small layouts may create flaps too narrow for stable assembly.
Print a draft on standard 80 gsm sheets before using heavier stock. Assemble the sample structure, insert the product, and confirm lid closure, corner alignment, and base stability. Make fine percentage adjustments of 2–3 percent if the fit feels too tight or too loose.